


Registration in 4 steps
Complete your registration information, make a bank transfer, and upload your payment slip for verification.
-
Fill in Information
New to ICSEC 2026? Open Register from the conference website and choose:
- Author / Presenter: enter your email and EDAS Author ID, then click Verify Author & Continue.
- Participant: enter your first name, last name, and email, then click Continue as Participant.

Select Author or Participants to begin your registration. Where to find your author details: Sign in to EDAS and open your profile. Use the email listed under Email addresses that matches your conference author record, and use your EDAS identifier as the EDAS Author ID.
Your IEEE membership information is shown under Memberships. If you select IEEE Member during registration, use your IEEE membership number. This is separate from your EDAS Author ID.
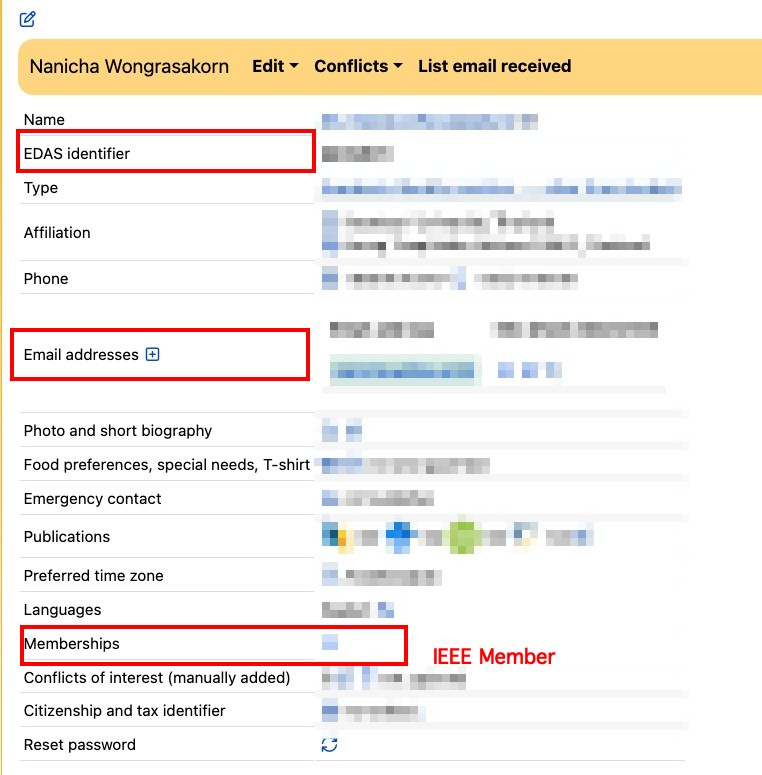
Find your EDAS identifier, email addresses, and membership information in your EDAS profile. -
Conference Registration
Conference Registration contains the details of the person attending or presenting at the conference.
Enter your title, first name, and last name. Check your email address and enter a phone number where you can be contacted, including the country calling code. For Thailand (+66), omit the leading 0.

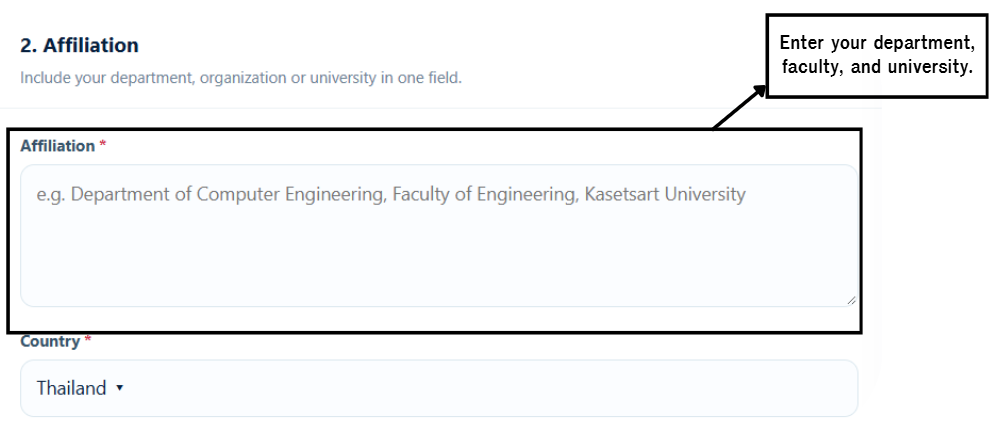
Complete your personal information and check your contact details. Enter your department, faculty, organization or university in the Affiliation field, then select your country.
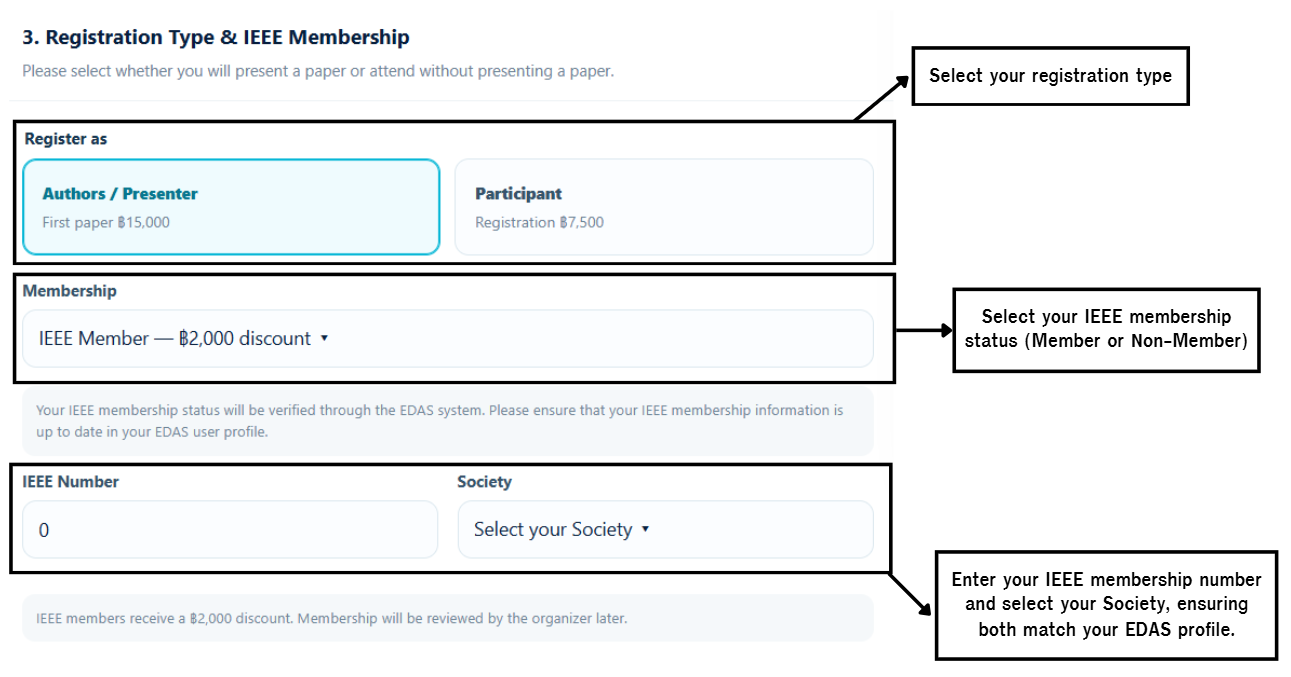
If you will present a paper, you must be listed as an author of that paper and select Authors / Presenter. Select your IEEE membership status. If you are an IEEE Member, enter your IEEE Number and select your Society for administrator verification, ensuring both match your EDAS profile. If you will attend without presenting a paper, select Participant.
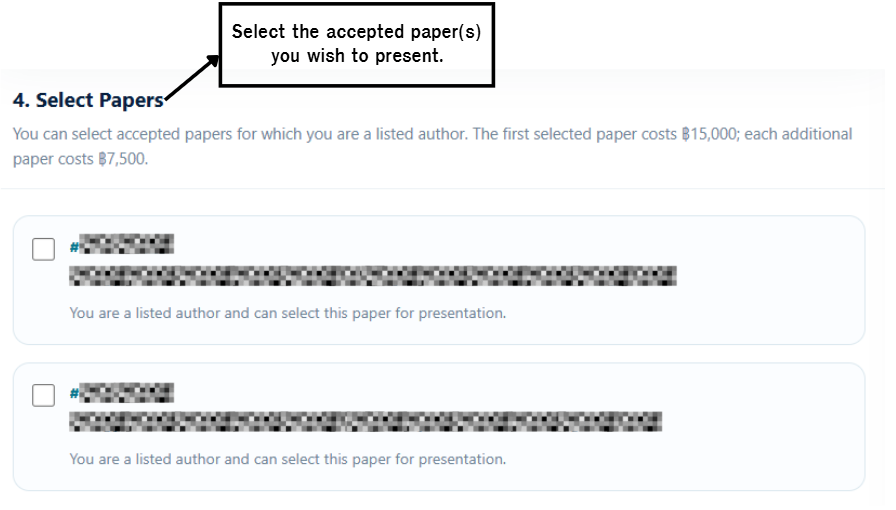
Authors / Presenters must select the accepted paper or papers they will present. You must be listed among the authors of each selected paper, and the paper must be available for registration. Participants can skip this section.
Select Join Research Networking if you wish to participate. Check the additional fee in your registration summary.
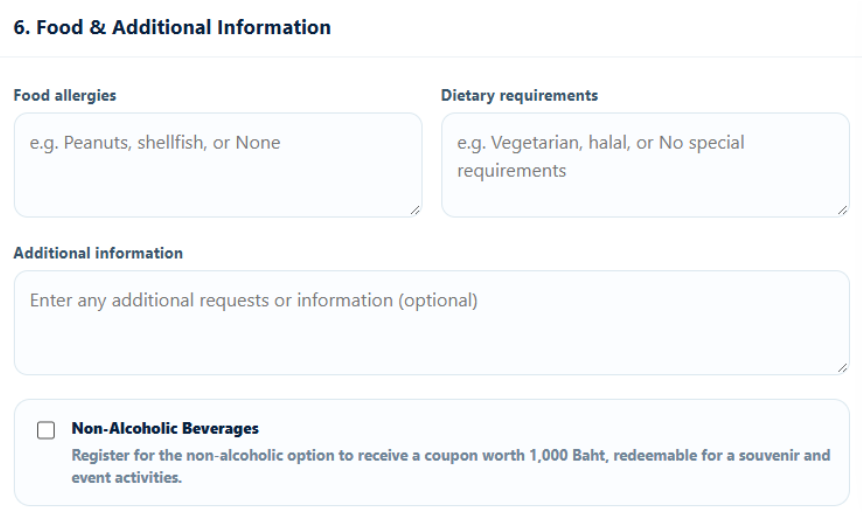
Provide any food allergies, dietary requirements, or additional requests. Select the Non-Alcoholic Beverages option if applicable.
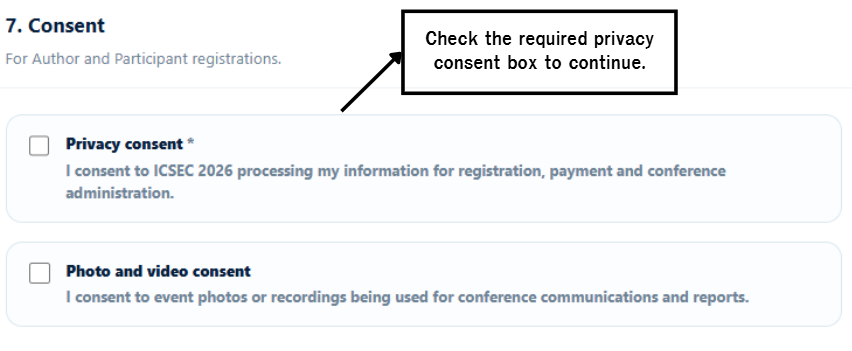
Read and check the required Privacy consent box to continue. Review the optional Photo and video consent before selecting it.
Review and submit: Check your registration details and total fee, then click Send & Submit to continue to payment.

Review your registration details and total fee, then click Send & Submit. -
Payment (Bank Transfer)
By default, the invoice customer name is set to the presenter’s name. You may change it to the name of the person or organization making the payment, if different from the presenter.
Go to My Registration and click Pay Now.
- Review your registration details, then click + Add Payment.
Registration Details shows the attendee’s or presenter’s personal and contact information. This is separate from the billing details used for the receipt.
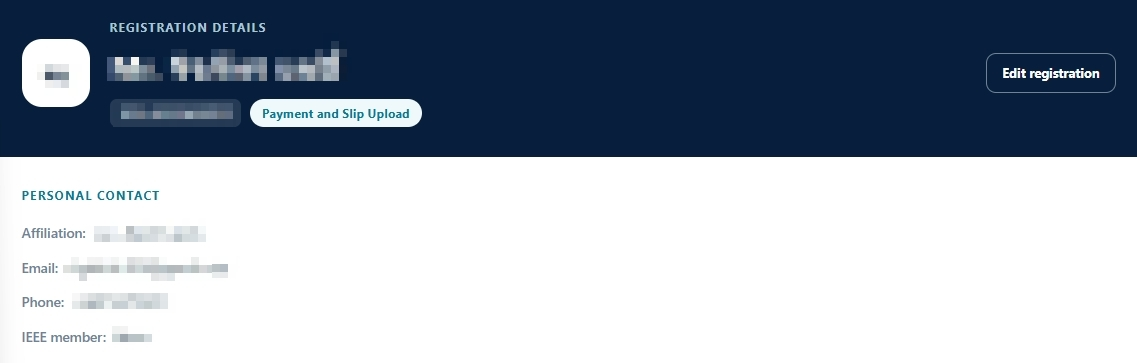
Personal information of the attendee or presenter. Billing Information is where you enter the customer name, billing address, and contact details for the payment receipt.
Note: Billing Information is a separate section for the name and address to appear on the receipt. Please enter the appropriate details in each section.
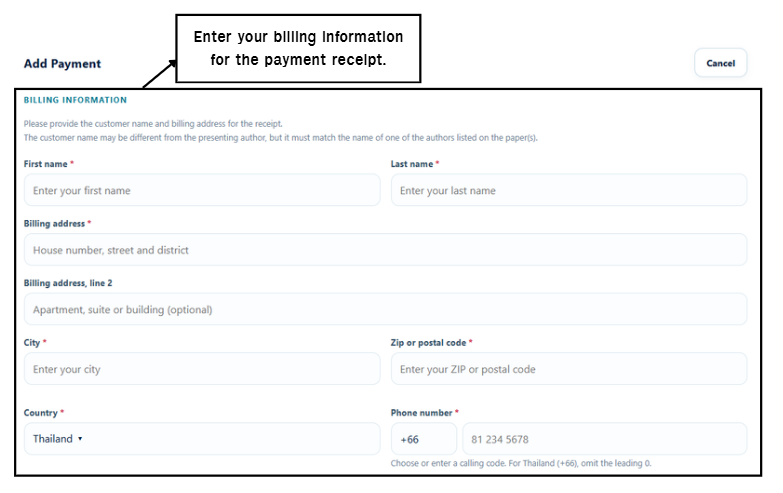
Enter the billing information to be used for the payment receipt. - Complete Billing Information with the name and address to appear on the receipt. These receipt details are separate from the attendee or presenter details in Conference Registration.
- Under Payment Transactions, select Domestic or International.
- Transfer the registration fee to the bank account displayed in the Bank section.
- Enter your transferring bank details, the actual amount transferred in Thai baht (THB), the transfer date and time, and the time zone.
Check the account details and amount before transferring. Keep your payment slip for the next step. Bank fees are separate from the registration fee.

Select your transfer type, check the bank account, and enter your transfer details as highlighted. - Review your registration details, then click + Add Payment.
-
Upload Payment Slip
Attach your bank transfer receipt in the Transfer receipt / payment slip field on the payment page.
- Upload a clear PDF, JPG, or PNG file, up to 5 MB.
- Make sure the transfer details entered in Step 3 match your uploaded payment slip, including the transferring bank, amount, transfer date and time, and recipient account. Check the time zone as well.
- Review your details, select the required consent checkbox, then click Submit payment for review.
- Check your dashboard for the payment verification status.
Your payment will be reviewed by the organizing team. Uploading a slip does not immediately confirm payment approval.

Attach your payment slip, confirm consent, and click Submit payment for review.
